We’re excited to welcome David Maren of Tendergrass Farms to RobbWolf.com with this guest post. He’s written this great how-to for rendering your own delicious lard.
Pork Lard is one of the most traditionally American fats that you can cook with. Until the 1960’s virtually every kitchen in this country had lard in the larder. Today, only a tiny fraction of Americans eat lard regularly and most of that lard is commercially produced and therefore hydrogenated and polluted with preservatives such as BHT. Despite the stigma that lard may have today, naturally rendered lard is mostly monounsaturated fat in the form of oleic fatty acid which is very healthy and great to use in almost any recipe that calls for fats. It’s especially renowned for its use in high temperature cooking such as deep frying. There are already plenty of great articles around the blogosphere that break down the reasons why lard is healthy so I’ll stick to the basics of making the stuff in this post.
Here I will outline the simple, fun, and easy steps in the age-old process of rendering your own natural pork lard from unprocessed pork fat.
Here’s what you’ll need:
- Some unrendered pork fat (at least one pound)
- A knife and cutting board
- A crock pot
- A nice cooking spoon
- A ladle (or large teacup)
- A sieve (or some cheesecloth)
- Some mason jars with lids (the wide mouth kind works best)
This process will take anywhere from 2 to 8 hours depending on the level of heat that your crockpot puts out and the amount of lard you choose to render. Every pound of unrendered pork fat should yield somewhere in the ballpark of one pint of rendered lard.
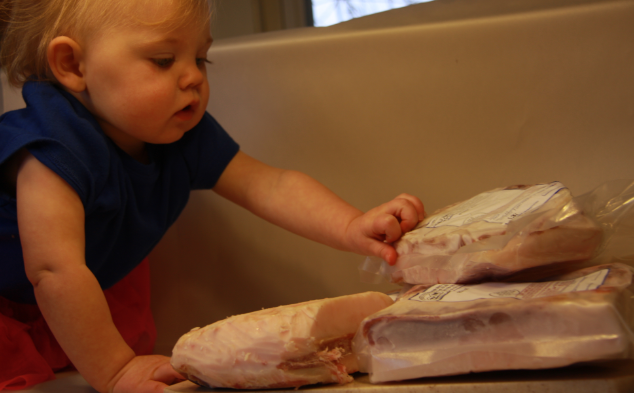
At Tendergrass Farms, we offer both pastured pork leaf lard and pastured pork back fat. If you purchase unrendered pork fat from a local farmer make sure to ask which kind of fat you’re buying. Leaf lard is from the interior of the animal near the kidneys and back fat is from, well – the back of the pig, between the loin and the skin. If you purchase back fat it will almost always have a little bit of red meat layered with the white fat while leaf lard tends to be more purely white in color through and through. Both types of fat are delicious and versatile but back fat does often have a richer flavor that may arguably make it somewhat less suitable for a few particular purposes such as certain desserts or baked goods.
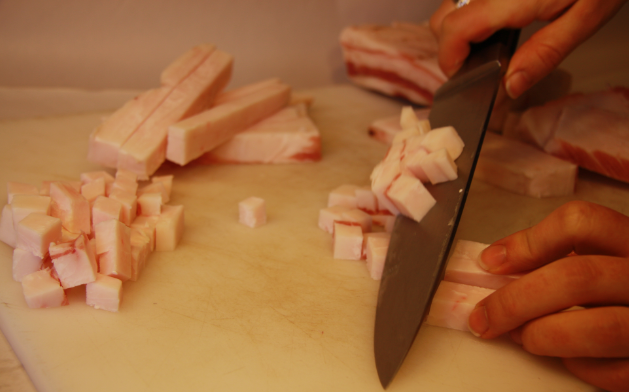
The process for rendering back fat (pictured above) and leaf lard is virtually the same. Either way, the first step is to chop it up before throwing it in the crock pot. The purpose of grinding or chopping the unrendered fat is to enable it to be heated evenly during the rendering process. Half-inch squares work quite well but you can experiment with the best chopping method that works for you. Lard is easiest to work with when it is frozen or at least well chilled.
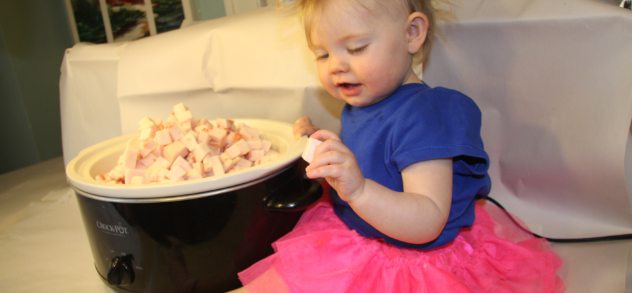
Once you’ve gotten your fat chopped up, you can go ahead and toss it in the crock pot. Mine fits about 7 or 8 pounds, but that’s pushing it. Yours may only fit 5 pounds or so. When deciding how big your batch of lard should just take into account that the size of your batch will determine how long it will take to render – the bigger the batch, the more time it will take.
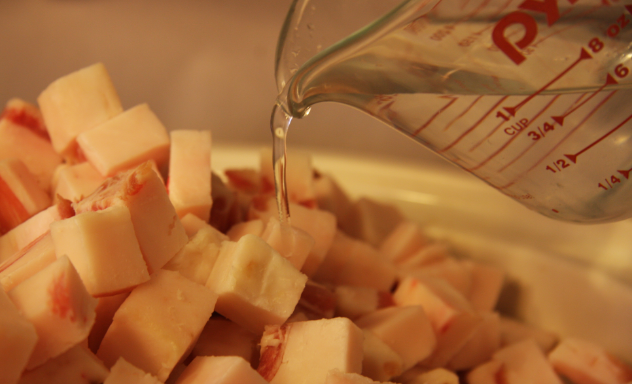
The next step is to add about a ¼ cup of water. This amount is not exact, and it doesn’t matter too much because it will evaporate out during the rendering process. The purpose of adding water is to help transfer the heat from the crockpot into the cold fat without scorching it.
Once you’ve added the water you can turn your crockpot on. Crockpots vary tremendously in terms of the actual heat generated at their various settings. Your goal at this point is to get the fat as hot as possible as fast as possible without causing it to burn. My crockpot is fairly low-end which may explain why I am able to leave it on high without any fear of the fat burning. I like to leave the lid on for at least the first hour or so in order to help the crock get up to temperature as quickly as possible. Be sure to stir the fat at least of every twenty minutes or so to make sure that it isn’t burning and to help distribute the heat throughout the crockpot’s contents.
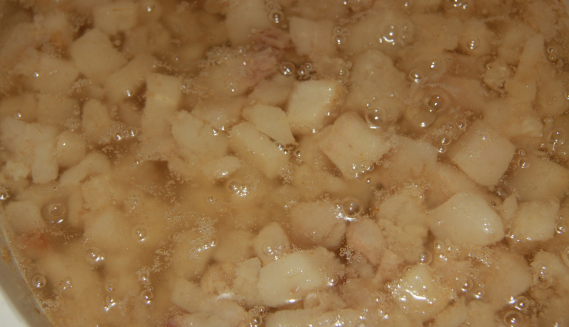
After an hour or two, once the fat has started to partially liquefy, remove the lid of the crockpot to allow any remaining water to evaporate. You may find it necessary to change the setting on your crockpot to low in order to keep the now partially rendered mixture just simmering lightly. You will notice that the volume of the contents of your crockpot will decrease somewhat as the fat renders into lard.
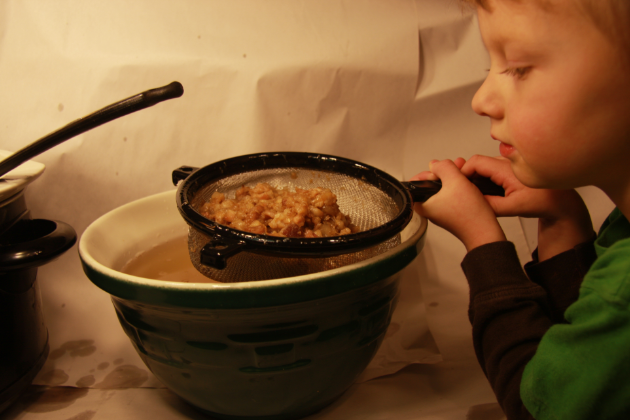
As soon as you notice that the mixture is about half liquid and half solid, it’s time to start removing some of the rendered lard in order to help the remaining fat chunks cook down further. The best method for separating the solids from the liquid is to use a ladle, a sieve (or some cheesecloth), and a separate bowl to collect the liquid lard. As you do this, return the solids to the crockpot to continue the rendering process, wait a few minutes, and repeat. Little by little you will continue this procedure until there is only small amount of relatively dry solids in your crock.
The solids that are left behind are called “cracklings.” They consist of minute pieces of tissue that had previously held the pig’s fat together. This is also where the little streaks of red meat mixed with the back fat end up. At this point the cracklings should be soft and not yet crunchy in texture. When you’re satisfied that you’ve gotten virtually all of the liquid lard out of the cracklings, you’re done with the lard making process. It is best to let your bowl of liquid lard sit for a few minutes to cool in order to be able to ladle it into jars without the risk of them breaking from the heat of the lard.
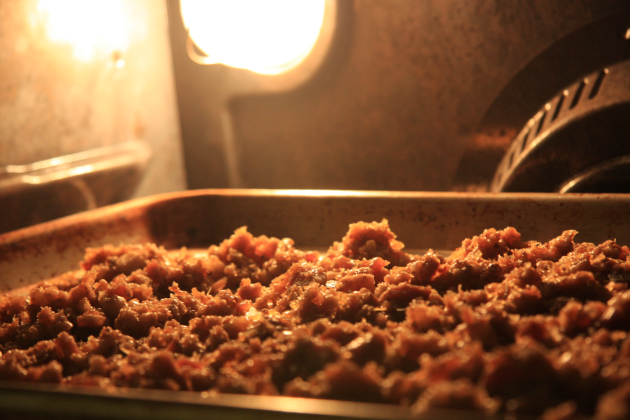
Meanwhile, throw your cracklings on a cookie sheet and bake them at about 375F for about 20 to 30 minutes. Once they’re crispy, they’re ready to be eaten!

Cracklings are incredibly delicious and protein rich. Add them to a salad or a pot of green beans or just snack of them throughout your day. They’re the perfect lightweight, high fat, high protein trail fuel.
By now your lard is probably cool enough to ladle into jars.
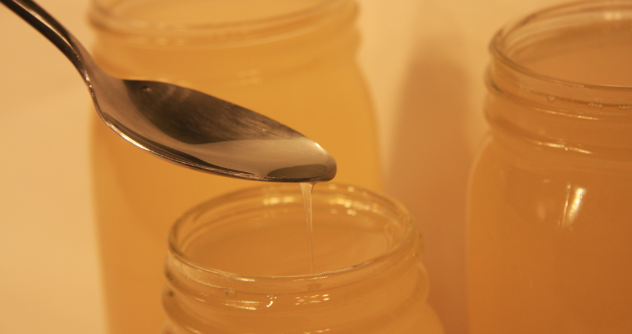
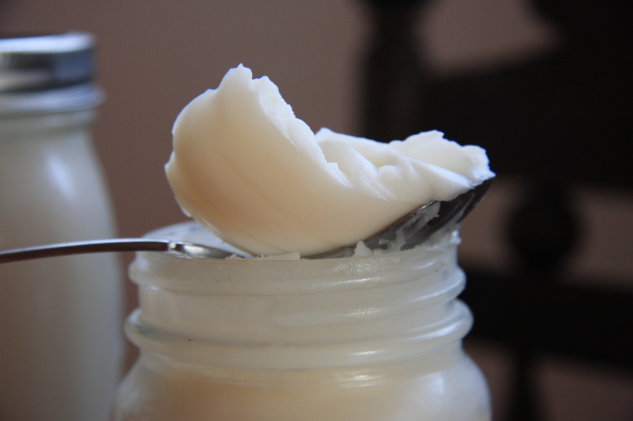
When hot, lard is clear with a slightly yellow glow but as it cools in your refrigerator it will turn snow white (see the first picture at the top of this post). Naturally rendered lard has a fairly long shelf life in well-sealed jars even at room temperature but it’s best to keep it in the fridge just in case it takes a few months to use it all up. It will last almost indefinitely in your freezer.
Lard rendering is by no means an exact science. The only ways that you can easily go wrong would be to either put your crockpot on too low of a setting (like “warm”) or if you were to burn your fat before it has had a chance to liquefy. If your fat seems to be taking too long to liquefy, just turn your crockpot up a notch and put the lid back on. If it seems like it’s trying to burn, stir it around a bit and turn it down a notch. Other than that, it’s pretty straightforward. Remember, some of you may render one pound in a very hot crockpot and it will take only two hours while others may render six or eight pounds in a cooler crockpot and it may take more like 8 hours. Either way it’ll work out as long as you’re patient!
David Maren is a husband, father, farmer, and co-founder of Tendergrass Farms. Tendergrass Farms is a cooperative online grass fed meats shop that exists as a bridge between the often geographically isolated family farmer and committed grass fed meats enthusiasts like yourself. The Tendergrass Farms vision is to sustain family farms through making it easy for you to purchase their meats by taking advantage of appropriate technology and ultra-efficient transportation models that enable their meats to be shipped to fans all around the USA.
If you’re not already a huge fan of Tendergrass Farms, you’re missing out: Go bookmark their site, like their Facebook page, and follow them on Twitter!

Hey, thanks for the coupon code! I needed some more lard, too; perfect timing. 🙂 I also like saving my bacon grease. My friends who don’t eat Paleo wonder what all the little jars of white stuff in my fridge are…
I was excited to use the coupon, but it says “The Coupon Code Entered is Invalid or Has Expired”. 🙁
Thank you so much for this offer! I am trying to put in an order now, and it’s saying that the code is not valid or expired.
Candice
Great article. I’ve been wanting to render lard and this is a great tutorial. Tried the coupon code and it didn’t work. Guess I wasn’t one of the first 25. 🙁
Looking forward to receiving the lard. Coupon code not received on my order either.
Hey there lard lovers!
You all rock. I just wanted to give everyone a quick update that not only has the coupon code now been used all 25 times but in fact we are now currently out of stock on our pastured pork back fat. (I guess y’all musta liked the post!) No worries, though – we’ve still got plenty of our pre-ground pastured pork leaf lard in stock here:
http://www.grassfedbeef.org/Beyond-Organic-Pork-Lard.html
Just choose the option for leaf lard instead of back fat.
On behalf of the farm families supported through your purchases, “Thank you!”
At your service,
David Maren
http://www.GrassFedBeef.org
800-929-1785
AWESOME! Thanks for the tutorial! Looks like a great project for a cold, rainy Sunday. Can’t wait to try it out. Thanks for taking the time to write this and share it with us.
How come I am singing The Power of Lard now?
http://www.youtube.com/watch?v=Ry0TyIJXgoU
Just wondering how do you store the lard and how long will it keep for?? Would love to do it but just concerned about the longevity of it.
Kate,
Here’s the lard shelf life breakdown:
– At room temperature: at least few weeks
– In the fridge: at least a few months
– In the freezer: at least a few decades
Hope that helps!
At your service,
David Maren
http://www.GrassFedBeef.org
800-929-1785
Thanks for the tutorial David. I have searched all over for lard and could not find it until now. I am off to your website to order the leaf lard now.
Hey David
Used your method after trying several others and it’s brilliant. We get organic rare breed back fat over here in Scotland and I just rendered a large amount of it, it’s so much better to cook with.
One question once you have your crackilings, do they need stored in the refrigerator?
Scotty –
Great question. Yes, it doesn’t hurt to stick your cracklings in the the fridge or freezer if you’re not going to eat them right away. They have a very low moisture content so they’re pretty shelf stable but it never hurts to keep them in the fridge if they’re not all eaten up the day you make it!
This is a helpful tutorial–thank you! Couple of questions–can one “render” lard from the process of cooking bacon? Or is that fat somehow different from lard? Also, I just cooked a beautiful pork shoulder in my slow cooker. Used some seasonings on it. There is a nice layer of seasoned fat on the top now that it has cooled. Can I store that in the freezer and use it?
Tracy
I just save bacon fat. It’s my main cooking fat actually.
I was able to scoop light colored liquid out of the crock pot but the later stuff that I scooped was a darker golden/light brown color. My husband says it smells a little burnt…different from the first batch I scooped out. Should I store it with the good looking stuff? Is it keepable?
Alexis –
I suppose it’s up to you. If it tastes good to you, don’t throw it out! From a food safety perspective slightly burnt lard is perfectly okay to use.
Thanks for presenting the process in such simple and understandable terms. I do have one question. Read about another method in which a pressure canner was used to preserve the lard, but your method does not seem to require this step. Is pressure canning only needed if storing for a long period of time without refrigeration?
Honestly I’ve never heard of pressure canning lard. I suppose it would work but freezing works great and it’s a bit easier from my point of view. However, if you plan to use it within a month or two the fridge is good enough.
Thanks for your post! Can I use a big pot in the oven, like around 200* F, instead of the crockpot?
Also, I often do small batches on the stovetop and I like to make ‘shiksa gribness’ with the solids. I toss a chopped onion with the solids before spreading them in the sheet pan. It makes incredibly addictive delicious onion-flavored cracklings. OMG. And the small amount of onion-flavored lard that pours off the pan is pretty spectacular too.
Jessica,
Yes – the oven method should work well. Just experiment a little with temps and times and you’ll get it sooner or later. 😉
I am rendering lard from a hog I raised myself. It hung for two days in my butcher’s cooler and then I retrieved the leaf lard and back fat myself. As it is rendering in the oven it is giving off the most incredible urine smell. My house stinks like a San Francisco stairwell. What did I do wrong, and should I just throw the whole mess out? I was very hopeful for this lard because I fed the pig fish oil to increase the omega3s in it’s fat.
Leaving a reply/update to myself here – I talked to my butcher about the wretched stink coming from the leaf fat. He has a habit of leaving the kidneys in the carcass while it ages. He admits that none of his clients has ever wanted the kidneys. I think he does that because it adds to the carcass weight, which is what he uses to calculate the cut/wrap charge. Since the leaf fat cradles the kidneys, and kidneys make pee (that’s why no one in eats them except mad dogs and Englishmen), the urine smell transfers from the kidneys, in even only a couple of days. I got some beef leaf fat from him last week because it smelled O.K. in his cooler (34 farenheit), but upon cutting it up and rendering it I experienced the same problem. The smell was not as strong even though the beef had hung for two weeks, I guess because these cattle are grass fed whereas pigs (mine included) eat a higher protein diet. So the take-away here is, for my next pig, I will be sure to remove the leaf fat before the carcass leaves the farm and try again. Or else just use back fat.
Hello, maybe a little late, but I thought it might help. If you are killing your own hogs, just be sure and cut the kidneys out when you dress it. That way the fat will have a chance to chill and be a lot easier to work with. I’m rendering some now done that way with no noticeable odor from the leaf fat.
It is impossible to buy lard here in Cambodia , this method works very well , thank you and God bless .
Thank you for the information! I do have a question, though – I actually rendered pork fat for the first time over the weekend, but not in the crock pot (wish I’d found this post first). I did it on the stove in a heavy cast-iron enamel pot, and left it rendering for about two hours. I followed all directions exactly, except that I never did get to the cracklin’ stage (got too impatient). My lard came out exactly as yours did, and once I checked it the next morning in the fridge, it is snow-white – yay! But it still has a very “piggy” smell to it. Is that normal? I really wanted to use it for pie crust and biscuits, but I’m afraid that the taste is going to be way off. I am definitely looking forward to using it for frying, though.
See my posting and comment above. I can’t believe there’s no info about this on the internet.
Melody
I used a cast iron pot on the stove too. Worked perfectly for me.
I used a wooden spoon and scraped pretty hard every 10 minutes for the last hour and then constantly for the last 15 when I got down to the last small pieces and the crackling. I had the heat on 2/6 on my stove.
Too bad you missed the crackling 😉
Great stuff David
Followed the instructions to the letter and I now have two jars of crystal clear liquid lard and a half container-full of scratchings.
That’s great to get one over Big Food and make something so simple and natural. Makes me angry how my parents were sold such a big lie about what’s healthy, and still people believe today all this low-fat nonsense.
OK. I’ll stop there!
Happy New Year and thanks again.
I just did my very first batch of lard (of course before I found this tutorial). When I brought the fat home, it did smell piggy, so I decided I’ll just salt cure it for a couple of days, to counteract possible smell and bacteria growth but washed it off before I rendered it (my grandma made Schmalz from salt pork, that’s how I got the idea). It turned out OK I would say.
Questions:
If I render for the deep fryer, do I omit the salt or is washing it off enough?
Were pigs fatter twenty years ago? My almost two pounds (800 grams) only yielded just over a cup, but reading you tutorial I’m also thinking I should have probably given it more time. Thank you.
Also, cut the skin off or leave it on?
So for deep frying how long can it go? Alton Brown is surprisingly loose on this suggesting it can be used more than one thinks. Is there an objective way to check lowered smoke point or rancidity?
I’ve been trying for two days to render about 10 lb pork fat and it’s taking FOREVER! I did half on the stove and the other half in the crockpot bubbling on low. Does it sometimes take over 24 hours to render 5 lb fat? What’s in the crockpot now is dark in color, probably because it’s been cooking so long, but there’s no sign of cracklins and there’s still lots of fat pieces left (maybe 1-2 quarts). I’ve ladled out lots of wonderful lard but I’m not sure this will ever finish! Thanks for any thoughts!
In the post David said he did his in the crockpot on high, and removed the lid after 1-2 hours.
Informative article, totallу what I was looking for.
I did mine in the crockpot (thank you, David, great how-to article). It took 2 and 1/2 days but that was partially because I had to turn it off when I left the house and did not let it render overnight either for fear of burning. Since this was my first attempt I intentionally erred on the side of caution VS burning/overheating. I fluctuated between the ‘High’ and ‘Low’ settings on my pot. Mine was back fat and has a nice light meaty aroma and flavour. Right now it’s a lovely light golden colour as a liquid. I did not remove the skin. Have just taken the cracklings out of the oven and cannot keep my husband away from the pan. They are scrumptious! I have the leaf fat to do next and am so grateful for this article and learning about how to keep the two types separate for different uses. My bags of fat have been in the freezer for 6 months or more so I was a little worried about the fat tasting stale or tainted when rendered but it is just fine. I’m going to store one big jar in the fridge and the rest in containers in the freezer.
Yeah. I just sent this link to my mum just to shut her up about how no-body likes lard.
Poor girl.
Filtered the liquid through cheesecloth, cooled for awhile, then reefer till next morning….mason jar is 3/4 pure white on top and a pale yellow on the bottom…I reckon I’ll have to remelt it all and separate. Is that correct?
I’m thinking it may be water as I failed to remove the top of the crockpot after a couple hours…drat!
You could probably just scoop out the white fat on top and put it in another container too, which might be easier.
Thanks for the reply, I’ll do just that.
tom
thanks!! Used your recipe to help render my first leaf lard successfully!! I unknowingly made cookies with a bunch of leaf lard without rendering it first. Everyone loved the cookies but I realize now that the membrane that I tried to pull out was in fact the cracklings! So my cookies had pork bits in it – could explain why everyone chowed down on the cookies!
Those sound like good cookies!
I had the problem of my fat taking too long to melt. Then maybe I did it too long, almost 16 hours and still not completely melted but it was beginning to smell strong, not really burnt but not odorless. The color of the lard melted is very golden brown. Is it still healthy to cook with it?
Unfortunately, I did not come upon David’s excellent instructions here until after my lard had cooked too long. It smells piggy but not “bad”. If some of you more seasoned lard renderers could chime in here I would be much obliged. If the lard I rendered (from pasture raised fat back) is not snow white (more off-white) and smells porky is it still healthy to cook with? I’m not looking towards baking much. more sautéing and adding to soups, etc. Thanks!
Very interesting comments on Lard Rendering.I would like to add a few tips as well.To remove any traces of smells,and fine grissle,I wait for the liquid lard to cool.I then add clean water,bring it to the boil,and let simmer for a few minutes.I then remove it from the heat,and leave to cool down a little.All impurities will settle to the bottom of the pot.After about thirty minutes,the clean liquid lard,can be scooped off,with a ladle.
Hello there!
I followed your directions to render lard and was wondering if you had the following experience:
I strained/ladled the liquid lard into a glass mason jar and let it cool for about 20 minutes. I then capped the jar and put it in fridge over night. When I got up this morning I was thrilled to see the “snow white” color however when I opened the jar there seemed to be a little “sink hole” happening in the middle of it. So the product was not level to the jar it was sinking into the center…..any thoughts on why that is? I am using organic, woodlot raises leaf lard in my rendering.
Thank you for your help
Kerry
The short/simple answer is that it’s just how it cooled with the outside of the jar cooling first.
I looking for answers as to why my rendered lard is liquid at room temperature! It’s from pastured pigs, and I rendered it on the stove top. I’m trying to make candles with it…liquid isn’t any good! Any ideas? Thanks!
If you’ve cooked all of the water out of it, then it’s probably just because there’s not as much saturated fat in it. Depending on the breed of pig, and its diet, the amount of saturated, monounsaturated, and polyunsaturated fats can vary some. It also depends on what part of the pig you got the fat from. The fat around the kidneys and such is usually the best for lard if you want the more saturated thicker stuff.
Hi!
This is my first time rendering anything other than something in photoshop or repairing the plaster in my home.
I have just come upon this lard rendering and I have what is likely the dumbest question you have ever been asked.
I went to the butcher, purchased the ‘fat back’ (which got me very strange looks and a lot of questions) and apparently it still has the skin on. It was very difficult to cut through. Are we to cut the fat away from the lard before rendering?
Asking for a friend. (Not really, it’s me asking for me)
Thank you.
UGH. I meant to ask, are we to cut the skin away from the FAT before rendering the lard. I’m sorry. I had a brain intertwanglement. Also, I am new.
So.
Thank you again.
My pork back fat still has the skin on. Can I chop that up and put into the pot as well?
While lard is not as bad for you as margarine, and even better to that end than butter, I think it’s an exaggeration to say lard, or any fat, is healthy for you. I’ve followed suggestions to grind the lard first and it dramatically reduces the rendering time. Cracklings though are an acquired taste and there’s a reason why they’re most popular in the parts of the US where fried foods are also the most popular.
Well, dietary fat can definitely be healthy for you. If you ate absolutely no fat at all, you wouldn’t get essential fats, absorb fat soluble vitamins, etc.
Did Tendergrass Farms’s domain names get acquired by Tendergrass corporation? What happened to the farms part? and this lard is no longer available anywhere few years ago. Disappointed!
It looks like they are the same thing, they just evolved into it I guess? https://www.tendergrass.com/about/