This post is part of a series of educational articles on gardening, self-sufficiency and food independence. That’s what The Liberty Garden is all about. To find out more about the mission behind The Liberty Garden concept, go here. Or read all the archives.
Many people never give a second thought to throwing kitchen waste into the garbage or grinding it up in the disposal. But all of that kitchen waste can be turned into an amazingly nutrient-rich amendment for indoor and outdoor plants via vermicomposting. Vermicomposting is a fancy term for composting with worms. Yes, worms! Worm composting is easy, a hit with the kids, and can be done year-round, making it easy to live a little greener. If you read my composting blog you know that people are interested in worm composting.
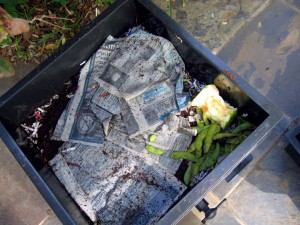
All you need for worm composting is a bin, worms, bedding, and food scraps. The system is quite simple, takes up very little space, and can be kept indoors. When the system is working properly there is no smell, and it produces valuable worm tea and vermicompost.
Compost Commodities
Worm tea is the liquid that drains from the bin. It is essentially the liquid waste of the worms and water released from the organic material during decomposition. It is odorless and extremely good for indoor and potted plants. House plants thrive on worm tea! It is loaded with beneficial microbes and nutrients, and can be used instead of a store-bought liquid fertilizer.
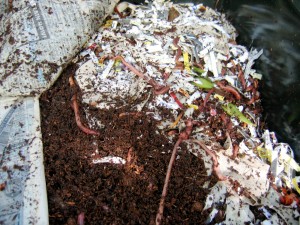
 Vermicompost is the worm castings, decomposed bedding materials, and food waste in various stages of decompostition. Worm castings are biologically active little clumps of bacteria, enzymes, and undigested bits of organic matter. They continue to decompose after they are deposited by the worms and sustain more beneficial bacteria than the same volume of soil.
Vermicompost is high in nitrogen, potassium, phosphorus and many other elements required by plants. The nutrients in vermicompost are released slowly, persisting in the soil for long term use. Vermicompost usually has higher concentrations of essential plant nutrients than regular garden compost. It is an excellent soil amendment and will improve soil structure, porosity, and water holding capacity.
A Bit about Bins
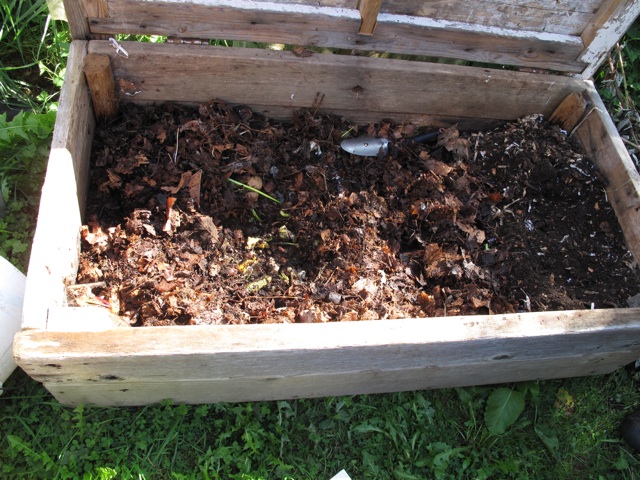
Worm bins can be homemade or purchased. Making your own bin generally costs less than $25 and can be constructed from wood, plastic, or recycled materials like bathtubs. Wood bins can be made from old dresser drawers, trunks, barrels, etc. Plastic bins can be made from buckets, totes, garbage pails, etc. Wood bins provide better insulation than plastic, and are more absorbent. Plastic bins are easier to move around since they’re lighter, and are easier to clean, but they can become very wet. A soggy worm bin will not work correctly.
Commercial bins cost around $100 and are available at most local garden shops and on-line. There are several different models to choose from.
To determine the size bin you need, weigh your food scraps for one week. If weighing your kitchen scraps is too much of a hassle, a bin that is two feet wide by three feet long and eight to twelve inches deep should be adequate for a family of four. Worms need one square foot of space to process one pound of food waste.
Some people prefer to have several small bins. They are easier to manage than one large bin, and are less likely to be overloaded with garbage. With multiple bins you can rotate the scraps you give to each bin. This is really handy for Paleo eaters and vegetable gardeners whose vegetable consumption is higher than most folks.
A Word on Worms
Only two very special kinds of worm can be used for worm composting, brandling worms (Lumbricus rubellus) or redwigglers (Eisenia foetida). Earthworms or nightcrawlers can not be used be used for vermicomposting; they live by tunneling through the soil, and they would die in the confines of a bin. Vermicomposting worms can be purchased on-line or at most local garden shops.
One pound of worms is sufficient to process the weekly kitchen waste generated by a family of four. The worms are adverse to sunlight and feed from the bottom to the top, meaning they will feed up through the layers of bedding and kitchen waste. They prefer temperatures between 55 and 77 degrees Fahrenheit. They can survive in an outside bin if it is sufficiently moist, well insulated, and has plenty of bedding. When temperatures heat up you will find the worms congregated in the middle of the bedding. One of the things I love about worm composting is that it is self sustaining. Once the system is up and running it will take about 2-3 months for the worms to start reproducing. You should never need to add additional worms!
Bedding Basics
Bedding absorbs moisture and provides air and space for the worms to live. Excellent bedding materials are shredded newspaper or computer paper, straw, sawdust, peat moss, and coconut coir. I use shredded paper because I don’t want to buy anything special for my bin. My goal in worm composting is to be as sustainable as possible, and it makes sense to use something I already have on hand. Aged grass clippings can also be used for bedding.
The bedding used to start the system should be moistened and aged. The bin should be filled three-quarters full before adding worms. Once the worms have been added new bedding can be added as the old decomposes. Some people like to vary the bedding material to provide a richer source of nutrients for the worms.
Stack up the Scraps
 Kitchen scraps and food waste should be added slowly in the beginning. It may take a few days for the worms and microbial decomposers to rev up their engines. Overloading the system with food will make it go anerobic and it will stink. When adding the first load of scraps, also add a little bit of gritty material like sand or dirt. The worms need the grit for their gizzards to work. Gradually increase the food scraps as the system becomes established.
There are two ways to add scraps. Add them on top of the bedding and cover the scraps with a light layer of fresh bedding, or bury them under the existing bedding. It is best to begin adding scraps to one end of the bin and work your way across with each new load. Make sure the scraps are covered by one inch of bedding and the bedding is moist.
If, after a few weeks, nothing seems to be happening, or the bin is really smelly, stop adding new garbage. Let the worms work on what you have, and when you begin adding new scraps, cut them up so that they’re easier to break down. Some people make kitchen scrap smoothies for their worms by processing everything in the blender before adding it to the bin.
The best garbage to feed your worms are coffee grounds and unbleached filters, vegetable peelings, leafy greens, pasta leftovers, crushed egg shells, and any other fruit or vegetable scraps. Do not feed your worms meat scraps, bones, or large amounts of fats, as this kitchen waste will attract rodents and curious neighborhood critters.
Worm composting is an easy way to reduce the amount of garbage you send to the landfill and it is good for your plants. It is an excellent way to compost year-round, and is so easy anyone can do it. It doesn’t matter if you live in a small house, apartment, or on a ranch, you too can let worms eat your garbage!
Recommended Reading
Photo credits: clarityjones | tomarthur | tomarthur


Great post and catch title! We’ve been composting for a couple of years, and its great to be able to reuse even kitchen waste rather than throwing away. (The only problem now is that our chickens compete with the compost barrel for who gets the kitchen scraps.
We actually have several types of compost going at any given time. We have a rotating barrel composer than can break scraps down in only a few weeks, a wooden bin that is specifically for our worms, and a large sized area with stone walls where leaves, chicken manure, etc go for longer composting.
I definitely got some new ideas from this post though… loving the series on gardening!